 |
| Does shiny mean conductivity? |
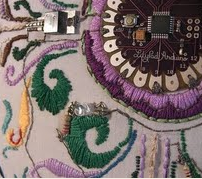
The third project or t-shirt phase, started on Thursday, June 10th by exploring connectivity with alligator clips and sewable parts. After some hands-on time of playing with the sewable parts and alligator clips I led a brief introduction to handmade switches (already designed in pillows, t-shirts, bracelets) so these could be incorporated into their t-shirt designs if wanted. Then the conductivity kits were passed out, containing a variety of materials (some resistant and some not) allowing the groups of youth to use the multimeters to test each material.
 |
| "Is it conductive?"...the game! |
 |
| Charlene quizzes a player |
While the youth were playing with the multimeters, t-shirts were laid out on several tables (mostly a boys table and a girls table-due to the girls being more of a form fitting style of t-shirt). After the conductivity hands-on group play, a conductivity game, led by Charlene and Ben, was played to informally test their knowledge (also this let the winners pick which t-shirt they wanted to sew a circuit on in an orderly fashion). The game was a huge hit! One of the participants tested the conductive materials with a multimeter and if the material was conductive or not. Hands were waved to be picked, the youth intently listened as others answered questions and clapped when the right answer was given. T-shirts were grabbed up, tried on/modeled and the enthusiasm ensued.
 |
| Youth design circuit in journal |
After the youth took their seats they started to draw out their t-shirt circuit in their journal using the three stickers (LED, switch & battery holder). We all milled around answering questions and checking off each design in the journals. Once the design was checked off the youth placed stickers on the shirts in the appropriate places.
 |
| An original shirt design! |
To aid in the sewing of the t-shirts (and to ensure that the youth wouldn’t sew the front and back of the t-shirt together) we again used 10” embroidery hoops to separate and stretch the material flat. For most youth the average sewing time took 1-2 hours to complete, unless additional designs or homemade switches were added to the shirts.
 |
| Ben at the switch check station |
We found one way to ensure that the proper connects were sewn was having a check station midway through, where the stitching connectivity could be checked and a new part handed out. This was a good place to remind the youth of the proper stitches length, parts placement, to secure each part with two loops through the hole, secure the knots with nail polish and to double check their drawing to the shirt sewing.
 |
| A lit rock star |
 |
| Calling Captain Kirk... |
As soon as the youth completed their shirt and the circuit successfully lit, the shirt was usually worn for the rest of the days workshop. However, the t-shirts were collected at the end of each day (as were the rest of the projects) and stored in their folder till the final day of the workshop when we were planning an open house.
Now onto our fourth and last project…the POV band, a highly anticipated project at the club, that looks like it belongs on a superhero!


No comments:
Post a Comment