 |
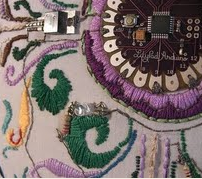
| Purple crane with purple LEDs! |
On Monday, June 7th, IU’s CT team: Kylie, Ben, Alex, Charlene, and myself (with Erin on cameras) started a two week e-textile implementation at the Boys and Girls Club in Bloomington, IN. The objective was to present and then evaluate a full range of newly designed activities & materials to 20 youth ranging from 7-12 years of age, from pre to post tests, journals, introductional presentations and tutorials on various e-textiles projects including paper & textile circuits as well as designing circuits, several presentations and hands-on activities with circuitry, electricity and conductivity and ending with the construction of a LilyPad project. Not knowing how the youth would react to several activities, we tended to have additional activities in our grab bag than needed, so we could easily replace it at a moments notice (e.g. homemade switches, pillow projects, glove project).
 |
| Working Circuit stickers with + and - added |
Kylie started with a brief overview for the workshop, then Diane presented a few slides & video clips to open a discussion about e-textiles in general and to illustrate what could be designed using this emerging technology and textiles. We then jumped into a sticker pre-test (see sticker picture of the working circuit parts) to see what their pre-existing knowledge of various types of circuitry was. (e.g. working, parallel, series, broken) We opted for the youth to design their own circuits using stickers and pencils, instead of a traditional science classroom circuit test, for several reasons: 1) Stickers are fun! (and we supplied decorated kid mechanical pencils too) 2) Some youth are intimidated by anything science-like and/or looking like a test (especially in an after-school environment) 3) The placement of the stickers (e.g. battery + or - to LED + or - ) is revealing about their previous circuitry knowledge. 4) The connections drawn between parts (with pencils, where the conductive thread will be sewn) will also help expose their understanding of a complete circuit (e.g. forming a loop).
 |
| Focusing at the crane table |
Next Ben and Alex took the floor with their Paper Airplane and Paper Crane tutorials in hand. The youth chose between the two paper and conductive tape projects and split up accordingly and we passed out the kits (e.g. precut conductive tape strips, 2 traditional LEDs, large paper clip). Each crane project youth chose what color/pattern of paper they wanted for their crane, while the airplanes used copy paper.
 |
| Finished plane! |
We found while the paper airplane took a shorter time to construct than the folding of the origami crane, the taping took longer on the paper airplane than the crane…so in the end the two projects were similar in total length.
Check back for parts 2-4 at the club!
*A special thanks to Leah Buechley for sending us LilyPad sticker sheets which inspired us to design our circuit sticker sheets!


No comments:
Post a Comment